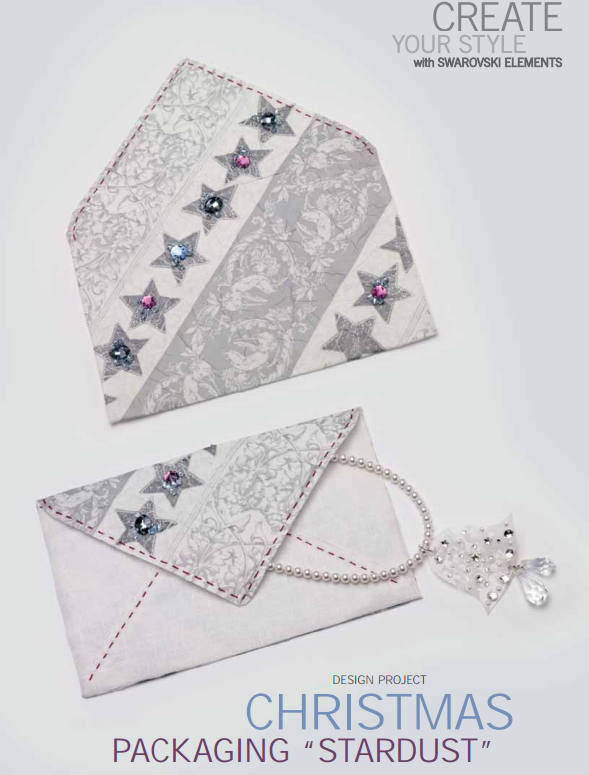
This Stardust envelope design is a uniquely beautiful and ornate type of packaging that is a piece of artwork in-of-itself. Designers and admirers alike will delight in the magic of giving and receiving.
SWAROVSKI ELEMENTS
Article Product Group Article No. Amount Size Color Color Code
Sew-on Stones 3200 3 piececs 10 mm Amethyst 204
Sew-on Stones 3200 1 piecec 12 mm Denim Blue 266
Sew-on Stones 3224 3 piececs 14 x 11 mm Crystal Silver Night 001 SINI
Beads 5328 45 piececs 4 mm Crystal Blue Shade 001 BLSH
Supplies & Tools
Supplies
Embroidery yarn, purple
Linen, cream white
Lining, white, 1 m
Nylon thread, transparent, 0.15 mm
1x Paper napkin, white silver
Tools
Embroidery needle
Iron
Paint brush
Pins
Scissors
Sewing needle
Textile Medium, transparent
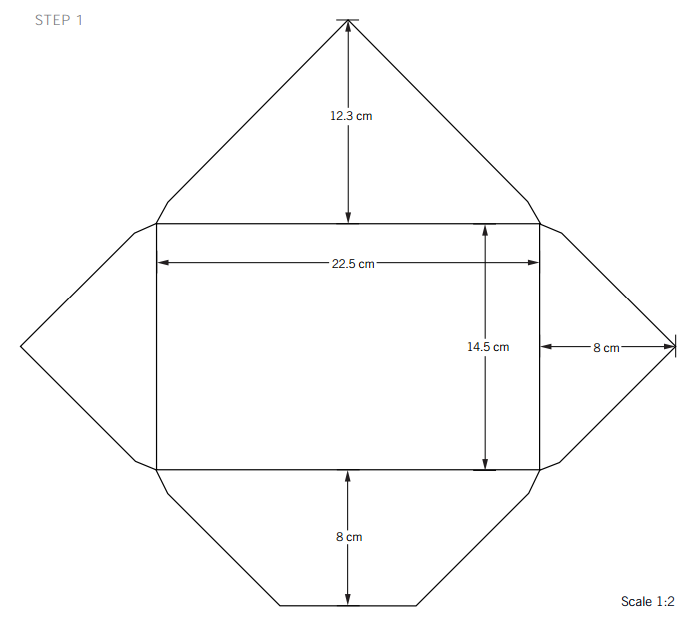

STEP 1: Make the pattern with the measurements as shown in the illustrations with this step. Please note the illustration is in 1:2 size.
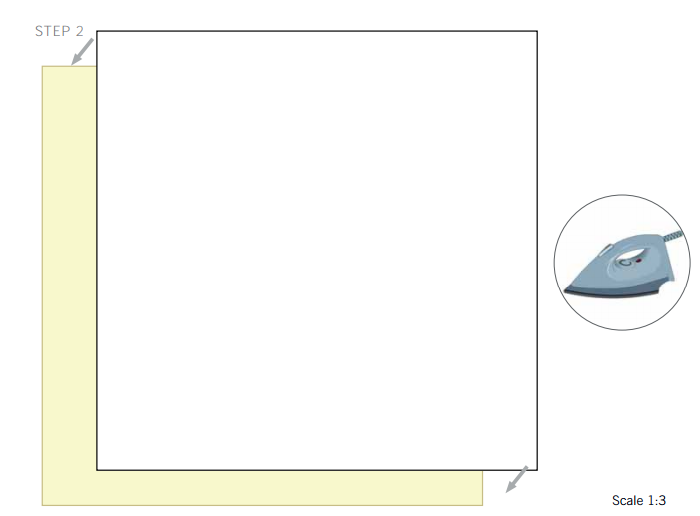
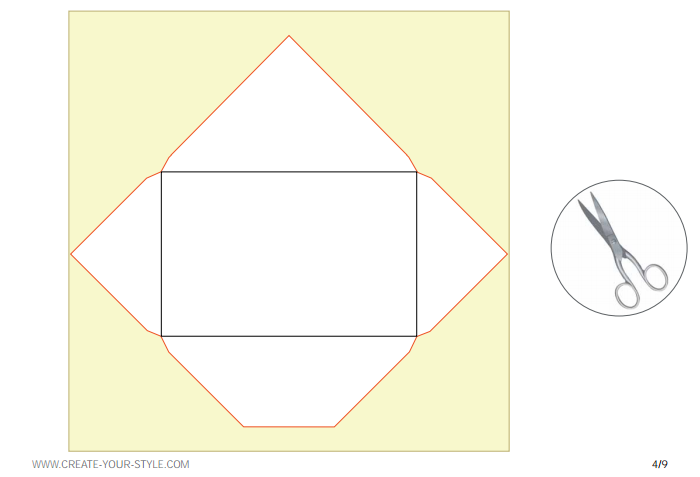
STEP 2: Iron the lining onto the linen and cut out the pattern.
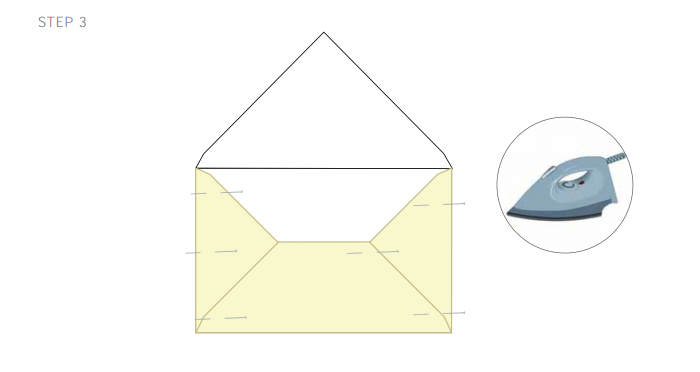
STEP 3: Bend the linen to an envelope shape, fi x it with pins and iron the edges.
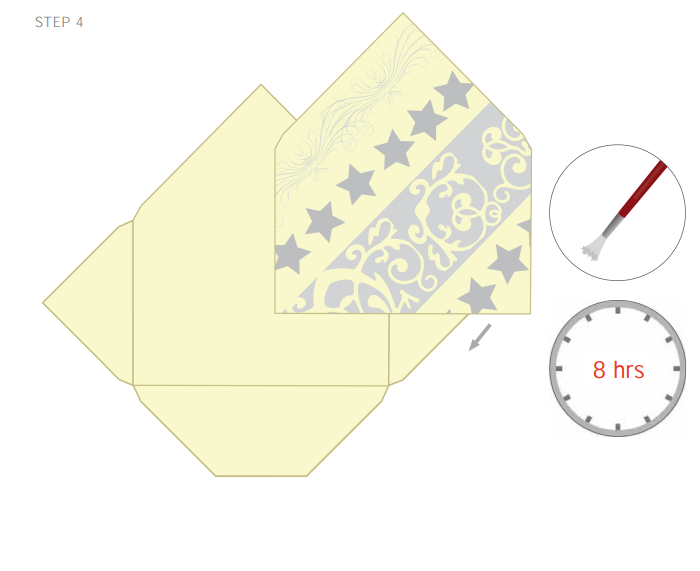
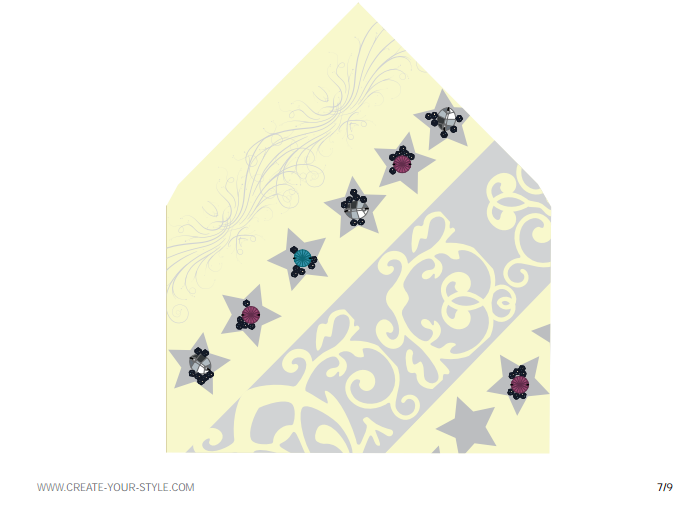
STEP 4: Unfold the linen and cut the paper napkin in the shape as depicted in the illustrations and place it over the linen. Adhere it to the linen using the transparent medium textile paint and a paint brush. Let it dry over night.
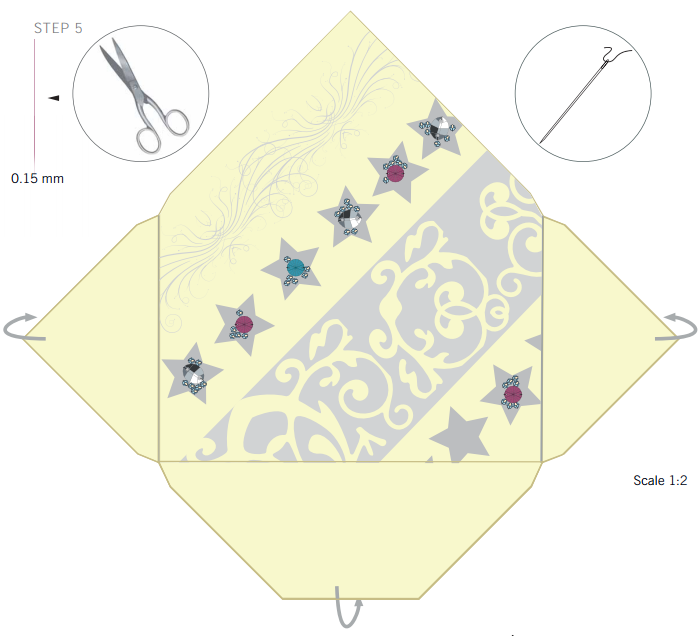
STEP 5: Cut 1 m of 0.15 mm nylon thread and sew the SWAROVSKI ELEMENTS onto the star shapes. Then fold the linen back to the envelope shape.
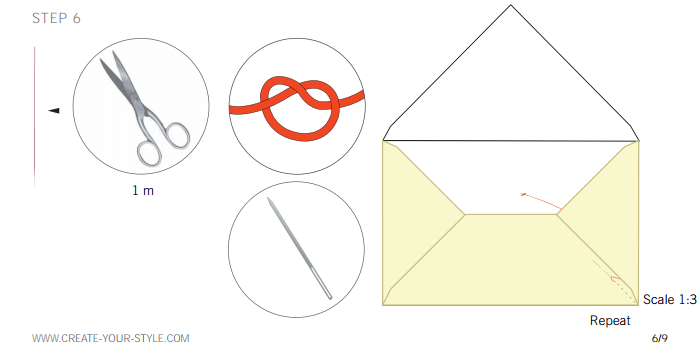
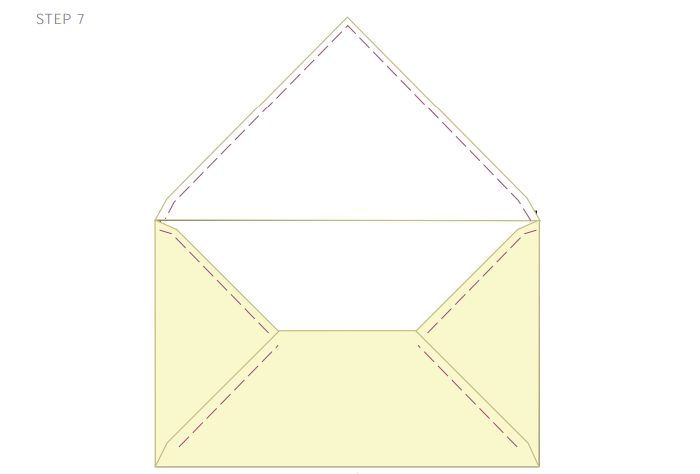
STEP 6: Cut 1 m of embroidery yarn, tie a knot onto one end of it and stitch from inside the envelope to the top part of the envelope and sew it together with simple basting stitches.
STEP 7: Tie a knot after the last stitch and cut off the excess leaving 1 cm. Please note that the knot will still lie inside the envelope.
