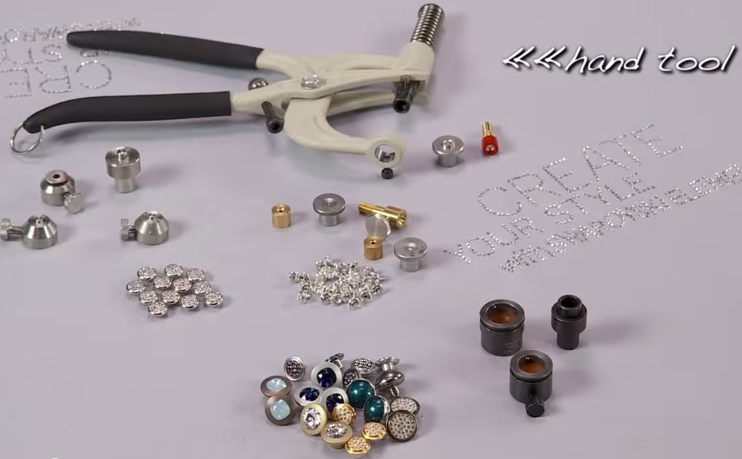
Crystal Applicator Hand Tool Video Tutorial and Instructions below!
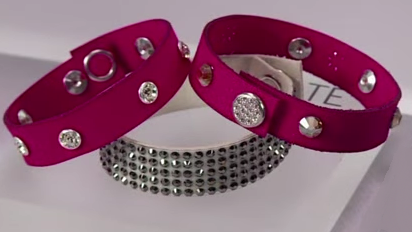
Learn how easy it is to create brilliant designs by applying Swarovski Crystal Rivets, Jeans Buttons, Snaps Fasteners, and Rose Pins to a variety of materials. This is a fabulous way to add a touch of sparkle to your favorite fashion apparel and accessories. Everyone loves to shine, so don't forget about your furry friends too! This is a great tool to beautify your dog or cat's collar, leash or apparel.
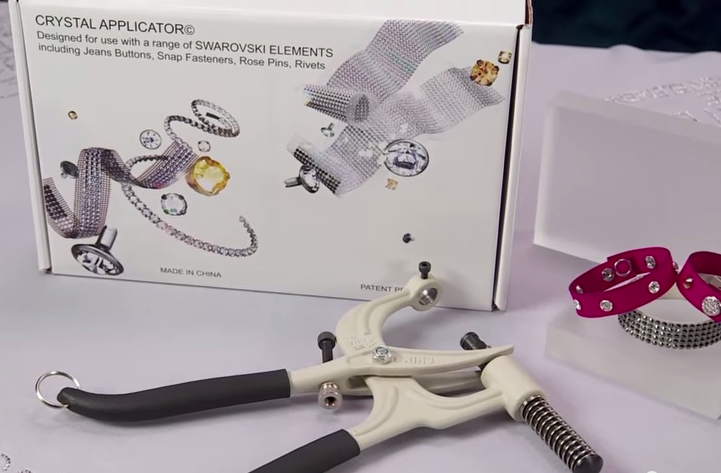
Click Here to Purchase this Fabulous Tool Now!
Crystal Applicator Hand Tool Video
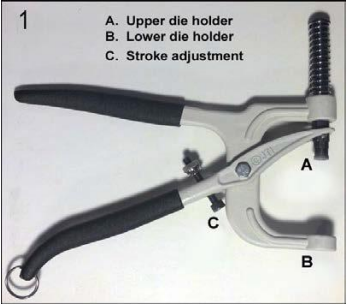
Using the Crystal Applicator Hand Tool (See Figure 1 below).
• Identify (A) upper and (B) lower die holders on tool.
• Ensure tool handles can be opened completely.
• If necessary, adjust with (C) stroke adjustment screw.
Note:
● It is always best to experiment on scrap material prior to making a permanent piercing/rivet application. Ease of operation and pressure required will vary with different materials.

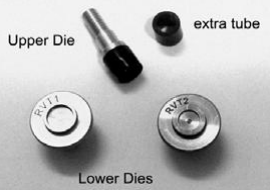
•Identify the correct dies for your project. Rivet size is marked on the upper die.
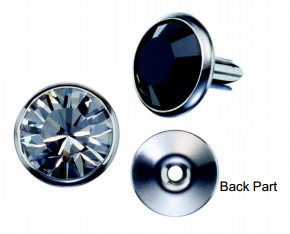
•For the large rivet back (Article 53007) use bottom die RTV1.
•For the small rivet back (Article 53009) use bottom die RVT2
•Attach the upper and lower dies to tool and tighten into position.
Applying SWAROVSKI ELEMENTS Rivets
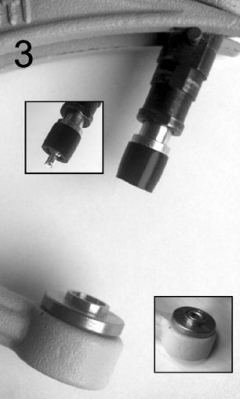
• Place the rivet in upper die.
•The bezel surrounding the crystal should make complete contact with the metal part
of upper die.
•The silicone rubber tubing is used to keep the rivet secured in place once it is positioned.
•The shaft of the rivet should point straight down at this point.
• Place the rivet back in the lower die.
•Place the plain side down, textured size up.
• Carefully place the material over the rivet back.
• Partially close the tool to be sure the location is correct.
•Depending on the application, you may want to slip pre-pierced material over the rivet shaft before squeezing the tool to secure the rivet.
•When handling the material, be careful not to change location of the rivet or back.
• Close the tool firmly. Squeeze handles until the rivet is securely attached to material.
•If material is not pre-pierced, this may require the use of both hands.
• Release the handles - the dies will separate automatically.
• Gently remove the riveted material from the upper die.

SWAROVSKI ELEMENTS Jeans Buttons
• Button Dies B1401, B1701 to be used with the following SWAROVSKI ELEMENTS Jeans Buttons:
14 mm Buttons (Use B1401) 17 mm Buttons (Use B1701)
1790/100 1790/104
1790/114 1790/140
1791/120
1792/100
1796/140
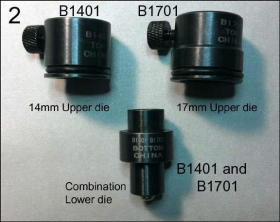
*Please Note: Style 1793/160 (Crystal Pearl Button) cannot be applied with these dies. Please Contact Us for this Die.
Applying SWAROVSKI ELEMENTS Jeans Buttons
• Pierce hole in material where button will be placed.
• (If replacing existing buttons this will not be necessary.)
• Select the proper upper die depending on the size of the Swarovski Elements Jean Button you are applying (14mm or 17mm) and screw it into the upper die holder on the tool.
• Put the lower die in the lower die holder of the tool
• Place the Jeans Button in the lower die with shank pointing downward (crystal facing up).
• Close the tool gently to catch the button correctly in the upper die.
• Place the nail portion of the button in the lower die.
• Position the material over the nail point.
• When handling the material, be careful that the nail doesn’t move underneath the fabric.
• The button will not engage if the nail is not perfectly straight.
• Squeeze the handles of the tool until the button and nail are securely attached to the material.
• This may require the use of both hands.
• Release the tool and remove button and material from upper die.

SWAROVSKI ELEMENTS Snaps
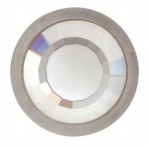
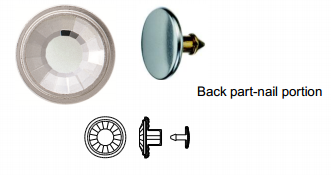
•There are four parts of the die set to apply the SWAROVSKI ELEMENTS Snaps
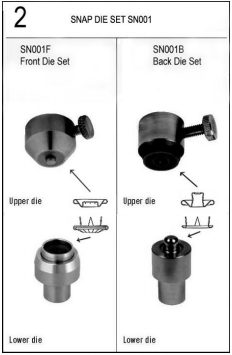
•Two for the front part of the snap and two for the back part of the snap - See Figure 2 below
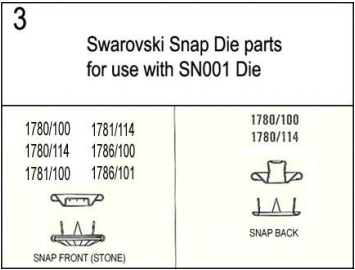
•Likewise, there are four parts to the SWAROVSKI ELEMENTS Snaps have four parts
•See Figure 3 below for SWAROVSKI ELEMENTS article numbers
Applying SWAROVSKI ELEMENTS Snaps
•To apply front of snap to material
•Identify FRONT DIE SET (SN001F) and attach upper and lower
dies to die holders A and B on tool.
•Insert Swarovski ‘snap front’ components in appropriate front dies.
•This operation includes the decorative snap front. (To match
correct dies and components, see details in Fig. 2.)
•Place material face down over lower die and squeeze handles, attaching front of snap to material.
•Release tool and gently remove material from tool.
•To apply back of snap to material
•Remove upper and lower dies and repeat steps 3-4 with BACK
DIE SET (SN001B) and ‘snap back’ components.
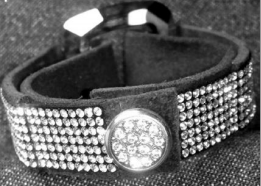
•IMPORTANT: For bracelet application, be sure material is face up when performing this operation.
•Release tool and gently remove material from tool.
•Front and back snaps are now applied.

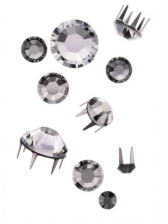
SWAROVSKI ELEMENTS Rose pins
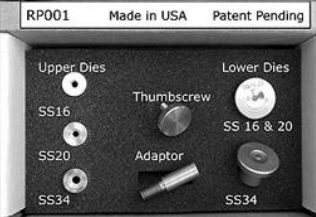
•Select the upper and lower die combination needed for project.
• The SWAROVSKI ELEMENTS Rose Pins come in the following sizes: ss16, ss20 and ss34.
•Please note: ss16 and ss20 rose pins both use the same bottom die, but different upper dies.
Applying SWAROVSKI ELEMENTS Rose Pins
(Refer to pictures)
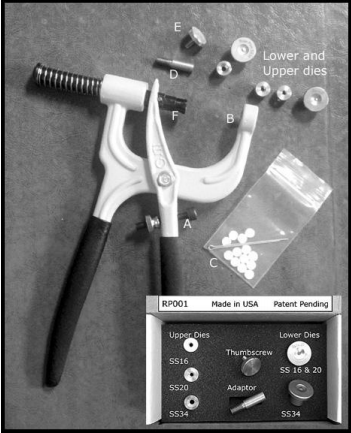
• Place the lower die in the lower die holder (B) and tighten the set screw to hold die in place.
• Remove the paper liner from pressure sensitive side of the disk (C).
•Disks are included with set.
•Place disk with adhesive side facing the bottom of the upper die.
•The adhesive side of disk faces the smaller hole on one end of the die. The enclosed cotter pin will be helpful in positioning the disk. (he cotter pin is packaged with the disks.)
• The unthreaded end of the adapter (D) is placed inside the upper die, pushed until snug, and tightened in place with the thumbscrew (E).
•For ease of assembly, it is better to partially thread the thumbscrew before pushing adapter in the shaft.
•This procedure also secures the adhesive disk in the correct position.
• Screw the adapter /upper die assembly into the end of the plunger (F) until snug.
• Gently press a rose pin of the same size as the upper die (appropriate size is etched on the upper die) into the small hole in the upper die.
•The top of the rose pin will fit into the recess and be held in place by the adhesive disk.
•It is easier to perform this attachment process while holding the Crystal Applicator ™ tool upside down.
•It is important to be sure the stone is secured and the prongs are pointing straight out.
• Position the Crystal Applicator™ tool right side up with the upper die above the lower die.
• Place your material between the dies and close the tool firmly.
•A small amount of pressure is required in order to secure the rose pin to the material.
•Pressing firmly will ensure the prongs will be pushed into place on the opposite side of the material.
•Note: Make sure to close the tool all the way. A slight clinking noise will be heard when the rose pin has been securely attached to the material.
• Release the handles – the dies will separate automatically.
• Remove the material with the attached rose pin gently from the tool.
Have fun and embellish away!
Please Contact us with questions or comments.
